
REALM TECHNOLOGY
How to get started with REALM.
Congratulations — your success has elevated you to an invitation to join the REALM collective; the most exclusive global community of accomplished real estate professionals ever assembled. The proprietary technology informed and developed specifically for REALM enables matches that are generated between listings and the unique profiles of your clients based on their lifestyle and investment preferences. The information provided below are key steps to successfully creating your REALM Member Profile as well as how to begin inputting your client database and listings.
While monumental, this is only the first step of your exclusive membership which includes networking, educating, business growth, strategic partnerships, and thought leadership in partnership with REALM Global.
Log In & Set Up Profile
- Once invited to REALM, you will receive an email invitation to access the platform. The email will contain log in credentials including username (email) and temporary password.
- Once logged in, you should set up your profile. It’s easy: Click on your headshot at the top right of the page and click “Your Profile” then select “edit profile” and complete the information, including photo and self-tagging, then select “save”.

Tagging Your Specialities
- Click on your headshot at the top right of the screen and choose “My Profile” from the drop down.
- Once the page loads, you will see a “Specialties” section with the option to “Tune Listing Tags”. This section is to showcase what types of property you represent or the type of property often found in your market.
- Once you click on “Tune Listing Tags” a Lifestyles page will populate with 14 topics. These lifestyles will have tags auto associated to them based on what you choose. For instance, if you were to choose “One The Water” your profile will automatically get tagged with tags such as Sailing, Scuba, Surfing, etc.
- Once you are satisfied with the Lifestyles you have chosen, you can click on the grey “Tune Tags” at the bottom right of the screen. You can edit any of the tags that were auto tagged when you were choosing lifestyles and add any additional tags that may apply. We recommend clicking the states you are licensed in and price points you work in at the minimum.

Upload Your Clients via Client File (Recommended)
- Log in to REALM
- In the navigation bar on the left hand side of the page, click on “Clients” followed by “My Clients”
- In the top right hand corner, click “Add Client”
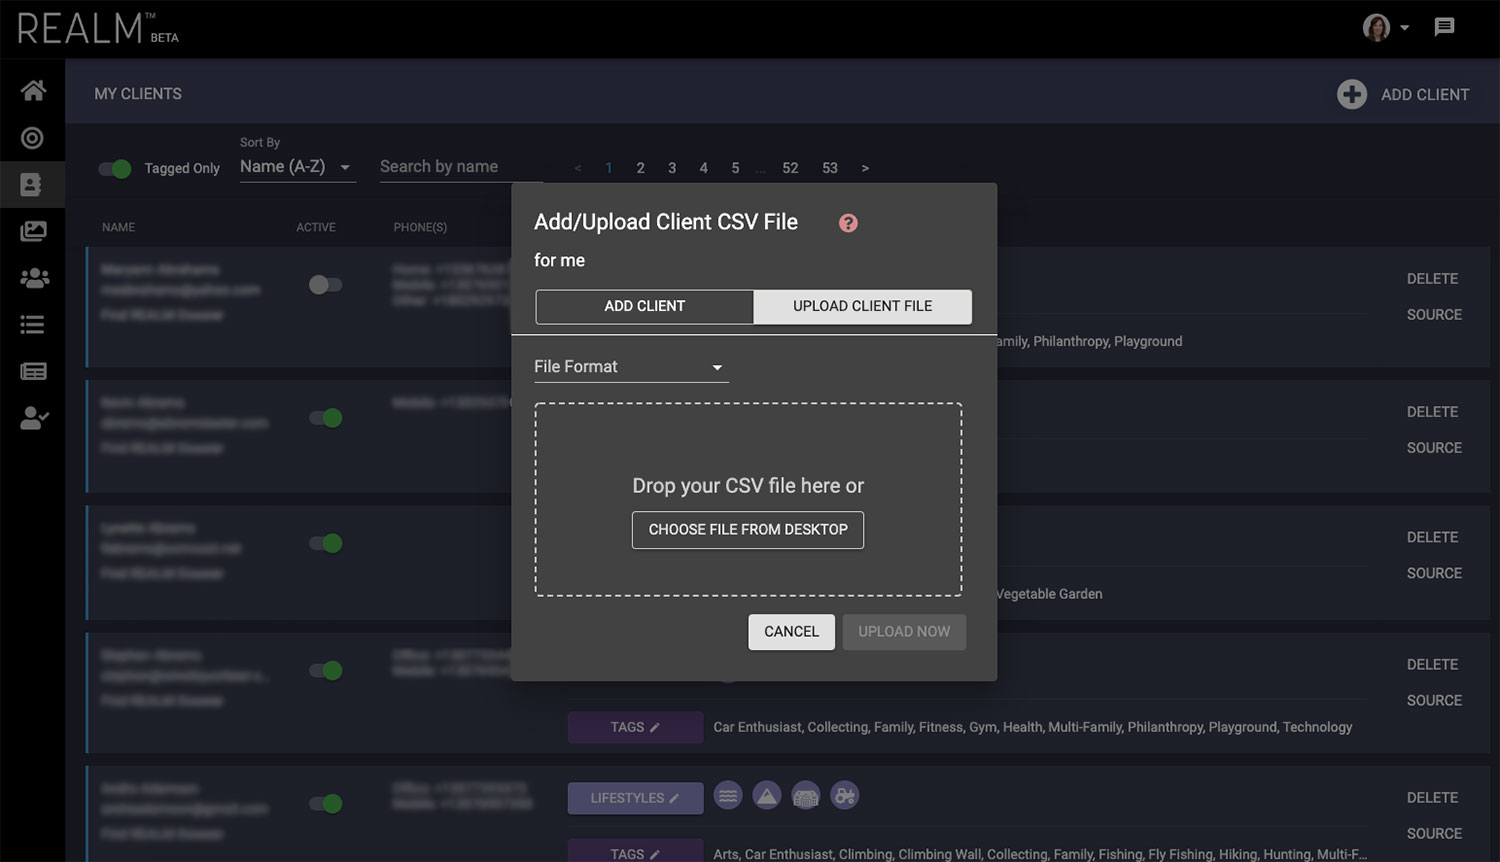
- Select your client file format. The platform accepts CSV files from TopProducer CRM, Sales Force, Outlook, Mailchimp and REALM format. Need assistance exporting CSV files then please follow this link for more instructions.The fields required for all forms of CSV uploads are first name, last name and email. If you would like you can also add an address and phone number
- Click on “drop your CSV file here” and select the CSV file for uploading
- Accept the terms and conditions and press “upload now”
- The upload process can take up to 4 hours. After the processing period, all of your clients will appear on the clients page
- Add and refine custom tags to your clients so they begin matching with compatible properties
Manually Add Each Client
- Log in to REALM
- In the navigation bar on the left hand side of the page, click on “clients” followed by “my clients”
- In the top right hand corner, click “add client”
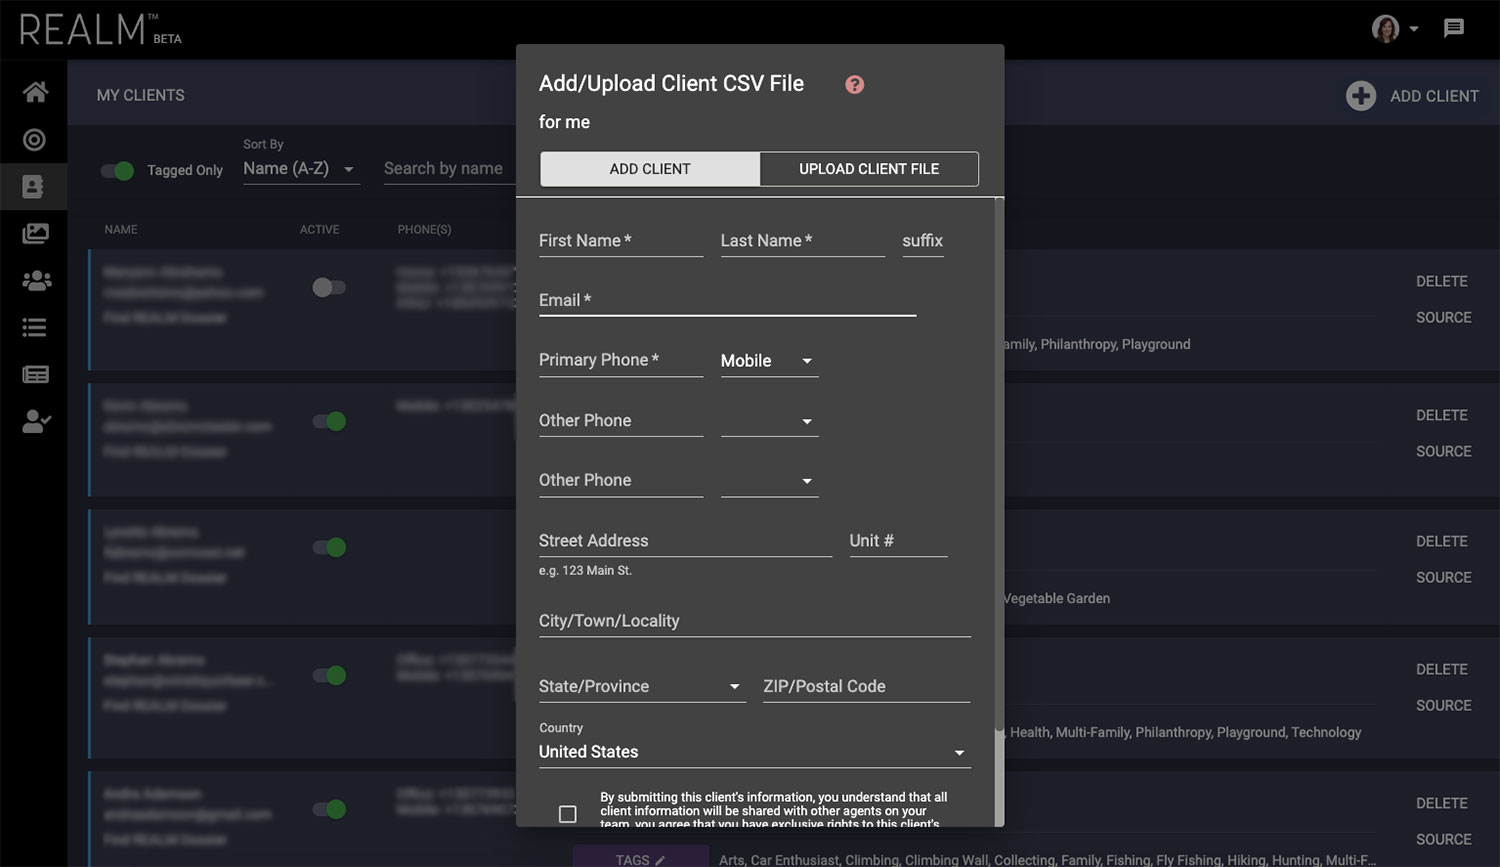
- While in the “add client” tab, fill out the empty fields with client information
- Accept the terms and conditions
- Press “add client”. You will immediately see the client appear on the clients page.
- Add custom tags to clients so they begin matching with compatible properties
Time to Start Tagging Clients
REALM™ intelligence automatically creates tags for your clients based on their passions and interests. And they’re from the same group tags that are applied to the listings. We’ve been able to find a lot of information, and have already created tags, on many of your clients. However, there are some of your clients we couldn’t find info on, so please go check them out and add some tags, it’s fun and really, really easy. For the ones we did create tags for, please double check our work and make sure these tags make sense for each client.
- Log in to REALM
- In the navigation bar on the left hand side of the page, select “clients” followed by “my clients”
- You will be taken to a page of your clients
- Select “tags” and “lifestyles” next to each client to edit

Manually Uploading Properties
While active listings can be automatically uploaded through a ListHub subscription, REALM is also able to host “REALM” and “Prospect” listings, which need to be manually uploaded. REALM listings can be seen and matched in REALM like an active listing, but they are denoted with a REALM Listing Banner. Trying to win a listing presentation? Do you have an upcoming listing that you want to find buyers for? If yes, the prospect listing function in REALM is perfect for you! Prospect listings can be matched to clients in REALM, but are only visible to you, so you can walk confidently into a listing appointment with pre-populated matches.
- Log in to REALM
- In the navigation bar on the left hand side of the page, click on “Properties” followed by “All Properties”
- In the top right corner, click “Add Property”
- Choose between Public, REALM and Prospect Listing
- In the pop-up box, enter the two mandatory fields (address and property description). Tags will be automatically applied to your listing based on the address, price, and information you put in the description field
- Click, save
- You will automatically see matches to this property on the properties page

Listhub Automated Setup for Properties
Should you choose to use ListHub to feed your properties into REALM, here are two videos that walk through that process. Please use your principal broker to set this up. Please let us know when this has been successfully completed.
This video details how to register for a ListHub account.
This video explains how to enter the REALM affiliate code.
Please note there is one last step not detailed in the video; after entering the affiliate code, you must go to the Publisher’s Tab and subscribe to REALM.
Time to start tagging properties
REALM™ intelligence automatically creates tags through the data feed for your listings based on the lifestyle attributes a listing can provide for a potential buyer. For example, do have a waterfront listing? If so, it will be tagged, and match you with a buyer’s agent in REALM who has clients with an interest in waterfront properties, plus who love beaches, sailing, fishing, or anything else that makes sense for your listing.
And because REALM can never replace the value of human interaction, REALM made it’s possible for you to add custom tags to your listings so that REALM can better do its job.
- Log in to REALM
- In the navigation bar on the left hand side of the page, click on “Properties”
- You will be taken to a page which will show all listings in REALM
- To find your listings, please click the “Show” dropdown at the top and filter by “My Listings”
- Once you find your listing you would like to tag, click on it. At the right of the listing you will see an option to “Tune Listing Tags”. From there you can add the appropriate lifestyles and tags that describe the property and what it can provide

What are the technology features that REALM offers?
- REALM’s collaborative matching platform automatically populates system tags for agent listings based off the lifestyle attributes a listing can provide for a potential buyer. For example, if a property has an incredible kitchen, it will be tagged so that it can match with a buyer who loves to cook.
- Tags lead to matches! Based off tags used, listings will match with clients sharing the same lifestyle interests or passions. Therefore, if a client loves to host parties, the matching platform tags will match the client with a property that is suitable for entertaining guests.
- Agents receive matching alerts via email and on the matching alerts page in REALM alerting them when a client or listing in their REALM has a match!
- It is important to note that clients don’t actually match to agents, but instead are matched with the property of another agent, allowing the trusted advisors to connect on behalf of their client or property. Agent’s client information is proprietary to that agent.
Best Practices for Engaging with REALM
-
Make a goal of connecting with 5 new REALM members per week. Particularly those members with clients matching your listings.
-
Engage one of the REALM Founding Partners to help with a challenging listing or client situation. Ensure that your clients know the depth and breadth of experience that you have at your finger-tips.
-
Use REALM intelligence garnered from your listing to plan a customized marketing plan that targets specific demographics.
-
Make it a goal to reach out to 10 clients and tell them about your new REALM membership and how it will benefit them as a buyer or seller.
-
Every quarter review and update your client’s REALM profiles.
-
Continuously review your client list and refine/add/delete tags to make the client profile as accurate and up to date as possible.
-
Attend one of the REALM networking events.
-
Follow up with every agent that views your profile with an introductory call or email to get to know them better.
-
Reach out to architecturally significant properties in your market and explain how REALM can help to find them buyers.
-
Reach out to active developers in your market and explain to them how REALM can help to vet their project prior to breaking ground as well as explain the benefits of a “phased” release through REALM.
-
Use exclusive access to the REALM platform to recruit other top producing agents to your brokerage.

